
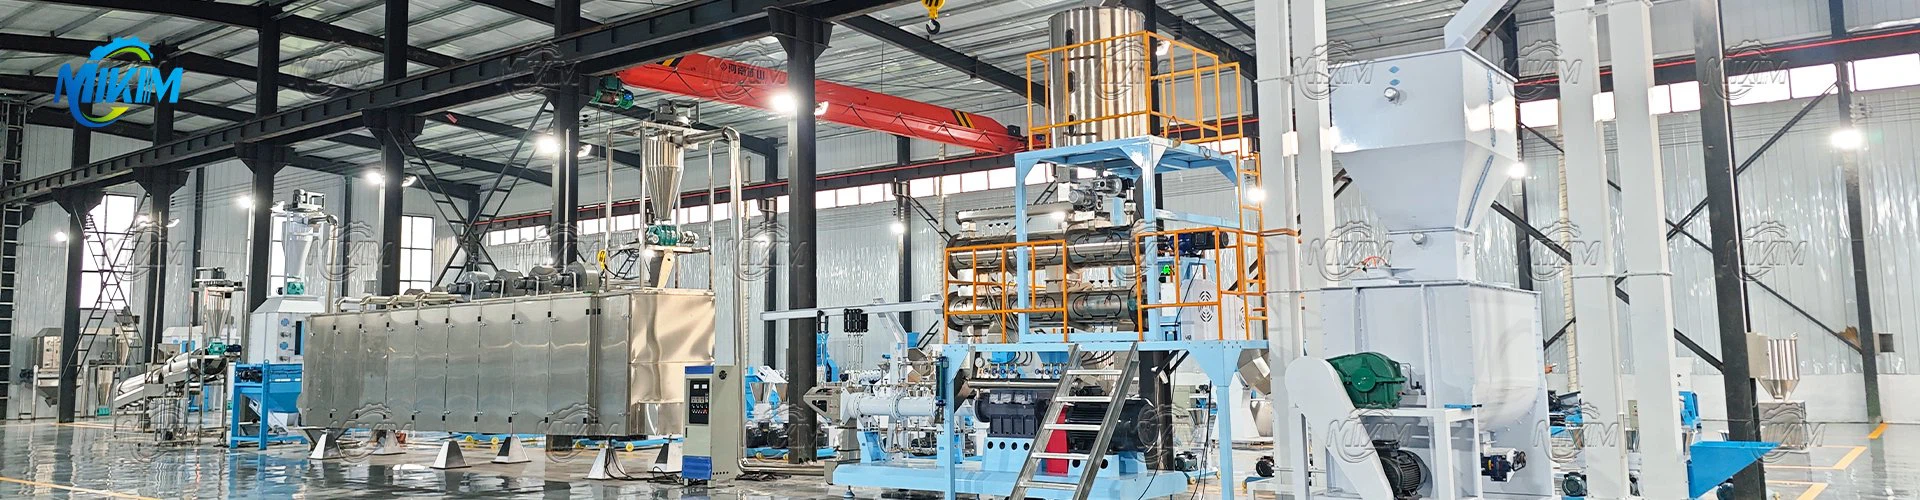

Quick answer - fish feed pellet making with machines: Cracked, dusty or sinking pellets are almost always a settings problem, not a machine problem. Pellet strength and buoyancy are set by grind fineness, mash moisture, extrusion temperature, screw speed and the drying curve. When a batch goes wrong, read those in that order.
Not sure which settings your recipe actually needs? Send us your target species, pellet diameter and raw-material list, and we will map the conditioning and extrusion window that fits your line. Ask for a process review →
What in Your Recipe Sets Quality Before Your Fish Feed Pellet Making Machine?
Good fish feed pellets making techniques start before the material ever reaches the extruder. Formula and grind fineness set the ceiling; extrusion only works within it. A coarse, uneven grind and a badly balanced recipe will produce weak pellets no matter how well you tune the machine.
Two things matter most here: how fine you grind, and how you balance starch, protein and binder. Both sit upstream of every temperature and pressure setting you will read about later.
The 1/3 rule for grind fineness
The most useful grind rule in aquafeed is simple. Keep the largest particle no larger than about one third of the die-hole diameter. Feed a die making 3 mm pellets, and you typically want the coarsest particles to stay under 1 mm.
In practice, extruded fish feed is usually ground finely. A hammer mill screen of roughly 0.8–1.5 mm is common. For smaller pellets, many producers aim for a meal that passes a mesh around 40–60 (about 0.25–0.42 mm). Finer, more uniform meal does three things at once:
- It gelatinises more completely, so the starch binds the pellet together.
- It reduces cracks and fines, because there are fewer oversized particles to tear the pellet surface.
- It smooths the extrusion flow, giving a steadier pressure at the die.
The trade-off is energy and throughput. Grinding very fine eats hammer-mill power and slows output, so it only pays when the pellet needs it. For small-diameter pellets, it usually does. Treat these as starting points and adjust to your own mill and screen.
Balancing starch, protein and binder
A floating fish feed pellet is held together by gelatinised starch and by the natural binding of cooked protein. The balance between them decides water stability.
As a rough working window, extruded aquatic feeds carry starch of roughly 15–25% and protein of roughly 28–36%, moving with species: lower protein for tilapia, higher for carnivorous species. The starch is not just nutrition; it is the glue. Too little and the pellet fails in water. Too much and the pellet turns sticky and hard to dry.
If your recipe is low in natural binders, producers sometimes include a functional binder or a grain fraction chosen for binding. The goal is not a single perfect number. It is to make sure your formula has enough gelatinisable starch to hold the pellet together while still meeting the nutritional target. For a deeper look at low-cost formulations, see affordable fish feed production: formulation and pelleting. For guidance on practical farm-made mixes, read the FAO note on making farm-made fish feed. And if you are still unsure how a finished line fits together, see how a complete fish feed production line fits together.
Why Do Moisture and Conditioning Decide Pellet Quality?
If you change only one thing to improve pellet quality, change your moisture control. A small drift in mash moisture moves expansion, buoyancy and pellet strength more than any other single variable. Most "unexplained" batch failures trace back to water.
Target moisture ranges
Before extrusion, the mash needs enough moisture to cook, but not so much that it turns to paste. In wet-type extrusion, the conditioner adds both steam and water, so the mash going into the barrel runs at roughly 20–30% moisture, with total moisture at the die landing near 25–30%.
Two cautions:
- Measure moisture at the mixer and again after the conditioner, not once at the start of the shift. Material absorbs and loses water as it moves.
- Recheck after any change in raw material. A new batch of corn or fishmeal can arrive at a different moisture than the last one, and your setpoints must follow.
Why "wet steam" ruins a batch
Wet-type extrusion lives or dies on steam quality. You want dry, saturated steam, the kind that carries almost no suspended water droplets.
"Wet steam" is steam that has picked up condensate. It reaches the conditioner as a mix of vapour and hot water. The result is trouble:
- Uneven moisture. Some of the mash gets drenched, some stays dry, and the mix cooks unevenly.
- Temperature swings and surging. Boiler pressure and warm-up lines matter. Cold, wet pipework drops condensate into the conditioner, so the first several minutes of a run behave differently from the rest.
- Blowback and blockage. Too much liquid at the die raises back-pressure and can plug die holes.
The fix is mostly routine: drain condensate traps, warm the steam lines before production, and hold boiler pressure steady. Conditioning temperature sits around 80–95°C, with a retention time of roughly 30–90 seconds. Confirm both against your own recipe and machine.
How Do You Dial In Extrusion Temperature, Pressure and Screw Speed?
Once formula and moisture are steady, the extruder becomes the instrument you play. Temperature, pressure and screw speed interact, so change one variable at a time and let the line settle before you touch the next.
Zone-by-zone temperature settings
An extruder barrel is not one temperature. It is a series of zones, each with a job. A typical profile for floating feed climbs as the material is conveyed and cooked:
- Feed / conveying zone, around 60–90°C. The material is moved and pre-heated, not yet melted. Too hot here and it can stick and block the feed section.
- Compression / cooking zone, around 110–150°C. Starch gelatinises and protein denatures under shear and heat. This is where the pellet's structure forms.
- Die / melt zone, around 120–160°C. The cooked melt is squeezed toward the die. Pressure and temperature here decide expansion as the pellet exits.
The die pressure usually sits between roughly 2 and 4 MPa (about 20–40 bar) for expanded feeds. It tracks your recipe, die and moisture far more than any textbook figure. Treat every number above as a starting window and tune with a moisture meter and a pressure gauge in front of you.
Matching screw RPM to capacity and cutter speed
Screw speed sets how much shear and heat you put into the material, and therefore how much the pellet expands. Higher RPM means more shear, more cook and more expansion; it also means more wear. Lower RPM gives a denser, less expanded pellet.
The rule of thumb: raise screw speed to increase expansion, lower it to increase density. Do not run the screw past the point where output no longer grows. Past that point you only add heat and wear. Match the feeder rate to the screw so the barrel stays full but not choked.
The cutter then sets pellet length, not diameter. Diameter comes from the die; length comes from how fast the cutter sweeps as the pellet exits. A cutter running too slow leaves long, stringy pellets. Too fast, and pellets become short and stubby while fines rise. Set cutter speed after you are happy with expansion.
The mechanics here are shared with the wider feed industry. For background, see this FAO overview of feed milling and extrusion processing.
Which Machine Class Do These Settings Apply To?
The settings above run on two machine classes. Wet-type extrusion injects steam through a conditioner, so it cooks and gelatinises more fully, and it is the standard route for floating feed at scale. Dry-type extrusion uses friction and barrel heating with no boiler, so it suits smaller output. The tables below confirm the drive and barrel size behind the settings you are tuning; verify the numbers against your own recipe.
Table 1 - Wet-type single-screw fish feed extruder

Table 2 - Dry-type single-screw fish feed extruder
Machine ratings, measured under test conditions. Your real output will move with the raw-material mix, moisture, pellet diameter and die condition, so treat these as a starting point rather than a promise.

How Do You Keep Floating Feed Floating?
You do not buy a separate "floating-feed machine". You run the one you have so the pellet comes out light, full of trapped air and stable in water. Know why that happens, and you can rescue a batch that has started to sink.
The expansion mechanism behind buoyancy
When the cooked, pressurised melt leaves the die, the pressure drops instantly. Superheated water flashes to steam inside the pellet and the structure puffs outward. That expansion traps air and lowers the pellet's bulk density, which is what makes it float.
Two readings tell you whether you have it right:
- Expansion ratio: the pellet diameter compared with the die hole. Floating feed typically expands to roughly 1.5–2.0 times the die diameter, though this varies by recipe.
- Bulk density: expanded floating pellets usually fall between 300 and 450 g/L, against roughly 550–650 g/L for dense sinking feed.
Higher moisture, higher temperature and higher shear all push expansion up. Drier mash and lower shear push it down. This is long-established extrusion science; for the fuller treatment, see this FAO fish feed technology consultancy report. For the mechanism in a research setting, read aquafeed extrusion research by Bouvier and Brisset.
Fixing pellets that float then sink
"Float then sink" is one of the most common complaints, and it has a short checklist:
- Too little expansion. Raise die-zone temperature and screw speed slightly, or raise mash moisture, so more air is trapped.
- Drying pulled the structure flat. A too-fast dryer collapses the fragile expanded cells. Slow the profile (see the next section).
- Recipe too dense. Too much fat or heavy ingredient shifts density up. Rebalance the formula.
- Die worn or wrong. A worn die gives uneven flow and poor expansion. Check die condition.
Always test buoyancy the same way: a fixed water temperature and a fixed soak time. Change how you test and you will chase noise instead of signal. For a walk-through of the whole float-making sequence, see making floating fish feed pellets step by step.
How Should You Dry and Cool Pellets Without Cracking Them?
Drying is where strong pellets are quietly ruined. A pellet that looks perfect leaving the extruder can split or crumble days later because it was dried too hard or packed too warm. Slow and steady wins here.
A multi-zone drying profile
Use more than one drying stage, and let each one do less. A workable pattern for extruded feed:
- Zone 1 (high moisture, gentle heat): remove surface water first, with air temperature around 80–100°C. Do not blast it.
- Zone 2 (mid moisture, moderate heat): drive internal moisture outward. Keep the temperature steady rather than rising.
- Zone 3 (low moisture, mild heat): finish the job. Lower the temperature so the outside does not case-harden and trap moisture inside.
Fast, hot drying creates a hard skin while the core stays wet. The core then shrinks and cracks the surface. Moisture also moves slowly, so a steady multi-zone profile is both gentler and better at hitting target.
Counter-flow cooling and final moisture target
After drying, cool the pellets before coating and packing. Counter-flow cooling, where air moves against the pellet flow, pulls heat down evenly. It matters more as pellet size grows.
The targets to hold:
- Final pellet moisture: at or below about 10–12%, so the feed stores without mould.
- Cooling endpoint: bring pellets to within roughly 5°C of ambient before bagging.
Bag pellets warm and the trouble is invisible at first. Days later the sack sweats from the inside, and the farmer opens it to caked, mouldy or broken feed. The machine did none of that. The packing temperature did.
When and How Should You Coat Pellets With Oil?
Fat is the priciest part of many recipes, and it does not like heat. Add it to the finished pellet, after the dryer, not before. Send it through the dryer instead and you are paying for energy that cooks off.
Drum vs vacuum coating
Two coating methods cover most aquafeed:
- Drum coating sprays oil onto the pellet surface as it tumbles. It is simple and affordable, and it suits lower oil additions. Its limit is that only the surface takes oil, and heavily loaded pellets stay greasy.
- Vacuum coating draws the air out of the pellet first, then lets oil in as pressure returns. Oil penetrates deeper into the pore structure, so the pellet can carry higher fat additions while still handling well.
Choose drum coating for a light top-dressing. Choose vacuum coating when the recipe calls for high oil inclusion, especially for fatty species where the energy has to go into the pellet.
Stopping oil weeping
"Oil weeping" is when free oil shows on the pellet surface or the bag. It wastes costly fat and leaves a greasy sack. Common causes and fixes:
- Too much oil for the pore volume. Reduce the addition or move to vacuum coating.
- Oil too hot or sprayed too fast. Let the oil and pellet meet at a controlled rate so it is absorbed.
- Pellets too dense to absorb. A denser pellet has less pore space; adjust expansion or accept a lower oil load.
- Coating before the pellet is cool. Warm pellets shed oil. Cool fully first.
Fish Feed Pellet Defects: A Troubleshooting Chart
In day-to-day fish feed pellet making with machines, this is the table to keep next to the machine. Read down from the symptom you can see, check the likely causes, then apply the action. Work one change at a time. For the patterns behind these faults, see common problems in fish feed pellet making machines.
One step past a blocked die is a die that stops discharging altogether. When pellets stop coming out rather than just running thin, work through why a fish feed extruder stops discharging before you reach for a spanner.
Same recipe, different result every shift? That is usually a wear-part or moisture-control problem, not a mystery. Share your pellet samples and settings and we will help you build a stable parameter sheet. Talk to our extrusion engineers →
How Do You Change Dies and Manage Wear Parts and Daily Maintenance?
Wear is normal. Downtime is optional. A die, screw and barrel all wear with every tonne you run, and the drop in quality is usually gradual until it becomes a batch failure. Planned replacement beats emergency repair.
Die & roller replacement triggers
Do not wait for a die to fail. Replace or refit when you see any of these:
- Output drops while settings stay the same.
- Die-hole blockage becomes frequent or uneven.
- Pellet quality falls: more fines, poorer water stability, uneven expansion.
- Visible wear on the die face, or enlarged, out-of-round holes.
- Die/roller clearance can no longer be set to spec.
Die life varies widely with recipe abrasiveness, so track it by tonnes produced, not by calendar time, and log each change. Common wear parts to keep on the shelf: dies, rollers, cutter blades and screens.
A daily / weekly / monthly schedule
Two habits pay for themselves: log everything (settings, tonnes, pellet results) and purge the barrel between batches so one recipe does not contaminate the next. For screw and barrel wear, see twin-screw extruder wear and repair. For the upstream factors that raise yield, see what factors affect extruded fish feed quality and yield.
How Do You Keep Fish Feed Pellet Making With Machines Consistent?
Consistency is what turns a working machine into a reliable business. A customer who gets the same pellet every delivery comes back; one who gets a different pellet every time does not. Consistency is built from sampling and discipline, not luck.
Sampling and QC checkpoints
Sample at fixed points and record the results, so a drift shows up before it becomes a rejected batch:
- After mixing: check moisture and mix uniformity.
- At the die: check expansion and pellet shape.
- After drying: check final moisture and hardness.
- After cooling: check temperature and fines.
- Finished feed: check buoyancy, water stability and pellet size distribution.
Keep a one-page log per shift. When a result drifts, you can trace it back to the setting that moved. That beats re-tuning the whole line from scratch.
Operator start-up and shutdown discipline
Most inconsistency hides in the first and last fifteen minutes of a run. A disciplined routine closes that gap:
Start-up: warm steam lines and drain condensate; bring zones to temperature before feeding; start the feeder slow and build to rate; recheck moisture once the line is stable.
Shutdown: stop the feeder before the screw stops; purge the barrel so material does not sit and scorch; clean die and cutter; record final settings while they are fresh.
Rotate operators through the same written checklists and quality stays with the line, not with one person.
What Does Batch Control Look Like Across Line Capacities?
Consistency scales with the line. On a small line a single operator can hold every checkpoint by hand; on a commercial line the sampling routine and the control system carry more of the load. The table below maps the line classes so you can see where the same batch-control techniques apply.
Table 3 - Aquatic feed production line capacities
Small starter units can be built from individual machines as a reference point: a crusher rated 80–120 kg/h at 3 kW, a mixer at 130–150 kg/h at 3 kW and a dryer at 100–130 kg/h at 6 kW, with a total power of about 16–68 kW and a footprint of roughly 5×2×3 m. Whichever class you run, the sampling and routine above stay the same.
Fish Feed Pellet Making Techniques FAQ
What is the best moisture content for making fish feed pellets?
There is no single number, but wet-type extrusion usually runs the mash at about 20–30% moisture, with total moisture at the die near 25–30%. The right figure depends on your recipe and machine. Set it by trials and hold it steady: a moisture meter on the mash is worth more than any single number.
What extrusion temperature makes floating fish feed pellets?
Floating feed needs enough heat and shear to expand. Barrel zones usually climb through roughly 60–90°C in the feed zone, 110–150°C in the cooking zone, and around 120–160°C near the die, with die pressure around 2–4 MPa. Treat these as starting windows and tune to your own recipe.
Why do my fish feed pellets sink instead of float?
Sinking usually means not enough expansion or a collapsed structure. Check mash moisture, raise die-zone temperature and screw speed in small steps, slow the dryer so it does not crush the expanded cells, rebalance an over-dense recipe, and confirm the die is not worn.
Why are my fish feed pellets breaking or crumbling?
The usual causes are a coarse or uneven grind, low or unstable mash moisture, drying that is too fast or too hot, and incorrect die/roller clearance. Grind finer and more evenly, stabilise moisture, slow the drying profile, and reset die and roller clearance.
How often should you replace a fish feed pellet die?
Track die life by tonnes produced, not by the calendar, because abrasive recipes wear dies faster. Replace or refit when output drops at unchanged settings, blockage becomes frequent, pellet quality falls, or the die face shows visible wear or enlarged holes. Keep spare dies on the shelf.
How do you reduce powder and fines in fish feed pellets?
Raise final moisture into the 10–12% band so pellets are not brittle. Reduce excessive cutter speed, and raise conditioning temperature to gelatinise more starch. Replace a worn die, and fit the correct screener mesh so fines are separated and recycled rather than bagged.
What grind size is best for fish feed pellets?
Use the 1/3 rule: keep the largest particle no larger than about one third of the die-hole diameter. In practice this means a hammer mill screen of roughly 0.8–1.5 mm, and often a finer meal for small pellets. Confirm the target against your own mill and screen.
Can one machine make both floating and sinking fish feed?
Yes. One extruder can turn out both, because float or sink is decided by how far the pellet puffs and how you dry it, not by the machine itself. Change the recipe and the settings, and the same barrel runs sinking feed in the afternoon. See a fish feed extruder machine for how the platform works.